![]() R. Craig Collins >
Common > How To
R. Craig Collins >
Common > How To
How To: PowerPoint 2019 © R. Craig Collins, 2005-2020
This is intended to be a starting point to using PowerPoint; some more advanced features are mentioned as we go.
See also
https://support.office.com/en-us/office-training-center
Free Book PowerPoint Tutorials from https://edu.gcfglobal.org/en/powerpoint/ |
PowerPoint Tips (to Creating
a sample PowerPoint)
(If you have already read this, you way watch a video on PowerPoint or read a pdf exceprt from my PowerPoint book: PowerPoint Activity (pdf)
Presentation graphics, such as PowerPoint can help people better understand
what they hear, by adding visual reinforcement. Many people retain information
according to the following rates:
10% of what they read
20% of what they hear
30% of what they see
70% of what they see and hear...
... so by adding a PowerPoint show, you can increase retention, as well as giving
yourself a guide through the speaking. (Don't look over your shoulder to read
it, though!)
The parts of a presentation:
 |
Sample PowerPoint
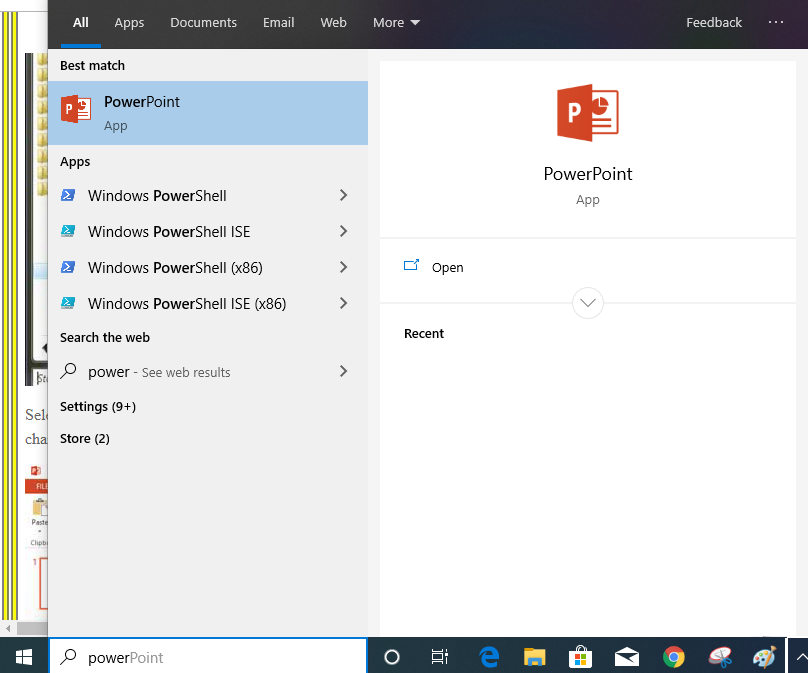
Begin by opening PowerPoint; press Start browse, or click in the Search bar type PowerPoint... when located select the icon

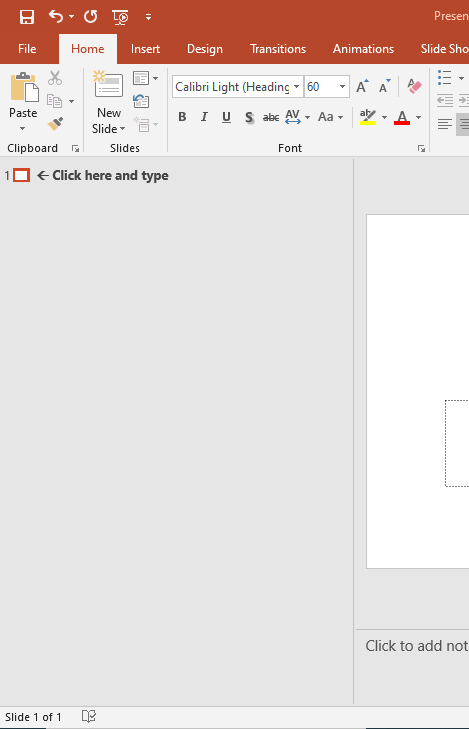
Select Blank Presentation, to get the following screen

I prefer to keep my hands on the keyboard, and to maximize my time. Rather than using the standard view, I prefer Outline view.
Next to the lightbulb icon ![]() at the top right, you may type Outline view, or by clicking the Normal View icon TWICE..
at the top right, you may type Outline view, or by clicking the Normal View icon TWICE.. 
Click next to the small box in the upper left hand window, and start typing... what you type here shows up in the main window.
In outline view, you may leave your hands on the keyboard, and not have to reach for the mouse.
Three rules:
At the end of each line, you press the enter key, and it stays at that level of the outline.
If you wish to increase the indent into the outline, press [Tab].
If you wish to decrease the indent of the outline, press [Shift]+[Tab].
Yes there are icons to increase and decrease the indent, but that can interfere with your train of thought when trying to quickly created your presentation.
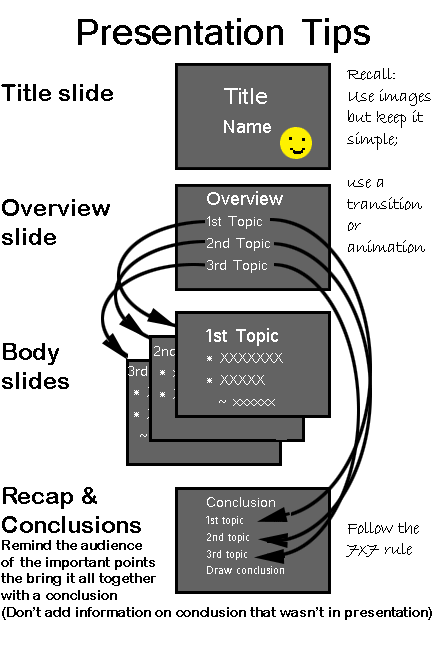
You should always start your presentation with a slide that lets folks know who you are and what you are covering.
Professions typically are making an assertion that they will support... in our simple presentation we'll just have a meaningful title.
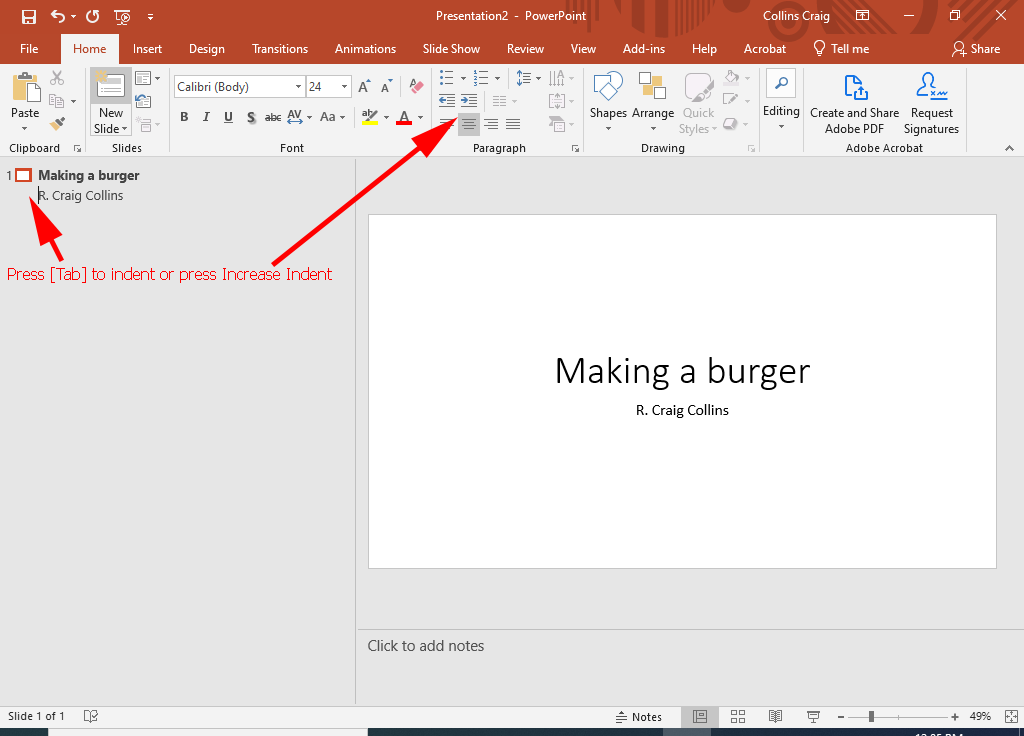
To duplicate what I have so far, again click next to the 1[] top left, and type: My First Presentation.
Of course, a better title would actually tell the people what the presentation was going to be about. Use your arrow keys, and move to get back to the beginning of the My First Presentation line. Just as Word can edit text, PowerPoint can to; replace the My First Presentation text with Making a Burger. Press the [Enter] key, then the [Tab] key, to increase the indent… then type your name. You should see a preview similar to the image above.
Hit the enter key to start a new line.
We don’t want to be at this level any longer, so to decrease the indent of the outline, press [Shift]+Tab]. This should create a new slide.
Note: when at the highest level, pressing the [Enter] key automatically inserts a new slide, using the default type: Title and Text (with bullets). You may also choose other types of slides by clicking the New Slide button.
A normal outline looks like this:
I. Major topic
   a. subtopic
   b. subtopic
      i. detail
      ii. detail
II Next topic
   a. sub topic
      i. detail
and so on.
In Word, when using an outline number list, or when in PowerPoint's outline view,
[Enter] starts a new entry at the same level you are on
[Tab] moves the current entry 'right' one level, such as from major topic to subtopic.
[Shift] [Tab] moves the current line left, such as from subtopic to major topic.
(You may also use the New Slide button, or the increase and decrease buttons on the Home tab.)

So if you are at the slide level, [Enter] makes a new slide, and [Tab] moves from major topic to subtopic, etc.
Make sure your cursor is in the outline, next to 2[].
This will be our overview slide, which briefly describes everything you want to present.
Some folks think of this as the mapping slide... which shows how the presentation will progress; at any point you need to let the audience know what you going to discuss, to prepare them to better retain the material.
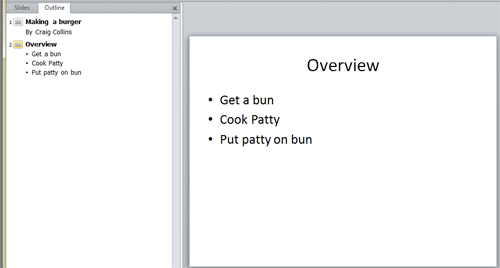
For this simple presentation, type Overview to add a title to the slide.
Press the [Enter] key, then the [Tab] key to move from the title to the bulleted list, then type
Get a bun. Press the [Enter] key.
This moves the next line of the bulleted list. Now type Cook Patty. This creates a new entry at the same level. Press the [Enter] key, to start a new line, and then type by Put Patty on Bun.
This would be a good time to save your presentation, perhaps calling it yourname-test.pptx.
This is what you should have, so far.
We are now ready for slide 3. As always, at the end of a line, click Enter.
There are several ways to lay out slides, but it is important to limit each slide to one main idea, and not overload it with text. Some folks use a slide with an assertion related to the first topic, a graphic that lays items to be discussed, and will identify key assumptions at the bottom.
In this simple presentation, we'll use talking points.
Make slide 3 look like:
Get a bun
Open Package
Take out bun
Put bun on plate
Notice that we took our major topic from the overview slide, and just added details.
Make slide 4 look like:
Cook Patty
Open Package
Take out patty
Put in Microwave
Follow cooking instructions
Make slide 5 look like:
Put Patty on Bun
Using a spatula, remove patty
Place patty on bun
Add lettuce and catsup
Add additional items to taste
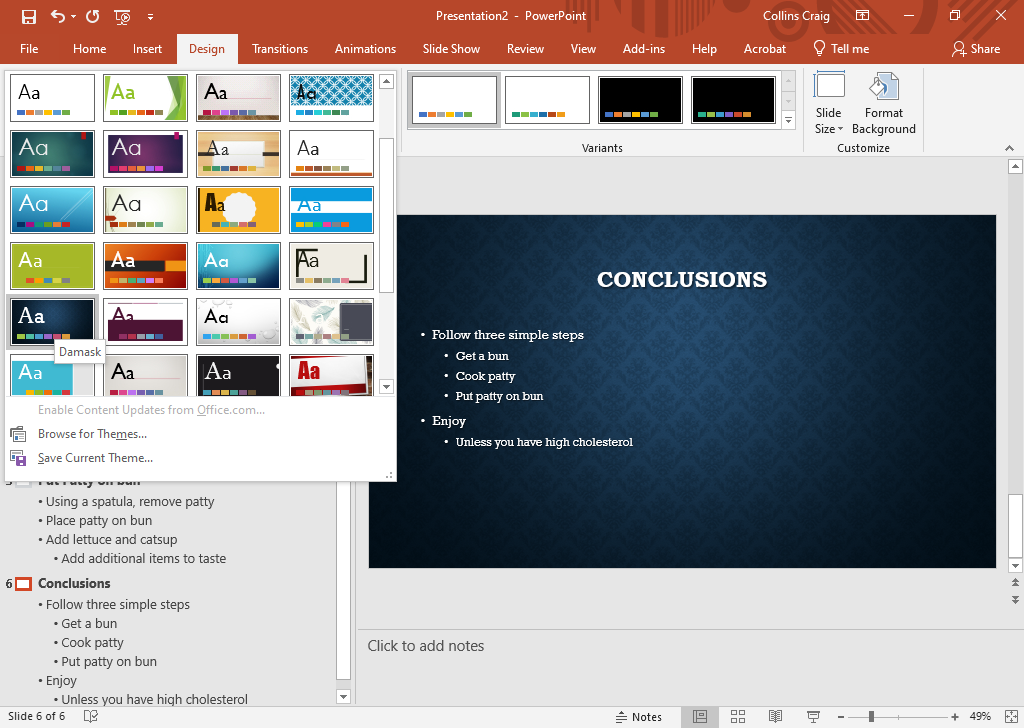
At the end of your presentation, you need a summary... perhaps remind them of the key points you made, and the deliver what you hope they learned. Again, it could be a summary statement, a graphic that puts it all together, and perhaps a request for questions, but again, we will be using talking points in this simple presentation. Make slide 6 look like:
Conclusion Follow 3 simple steps Get a bun Cook patty Put patty on bun Making Burgers is easy Enjoy! *unless you have high cholesterol |
The top part is the recap
This part is the conclusion. |
Additional sound effects, movies, pictures, etc. can be added from the Insert menu. More on this later.
The next step is to know where the presentation is to be delivered, and make sure you lay your presentation out so you entire audience can read it as you discuss it. For this presentation we are going to make some assumptions:
1) you have the typical lousy projector, lights have to be dimmed for folks to see what you have, and
2) it is a deep room with some folks fairly far away from you.
To deal with these two issues, we will use a dark background with light text for contrast, and big, easy to read fonts. Choose the Design tab, and select a theme. Experiment with some samples, I like Damask, but none are really good.

Selecting Damask
Return to the Home tab.
Now, let's run the presentation. Press [F5] to start from the beginning, or click the presentation icon in the lower corner to start the presentation from the current slide.

Okay, not bad, but a little boring. And, the font is too small. On the View tab, choose Slide Master...
View>Slide Master

...and select the Title and Content slide... the one below the title
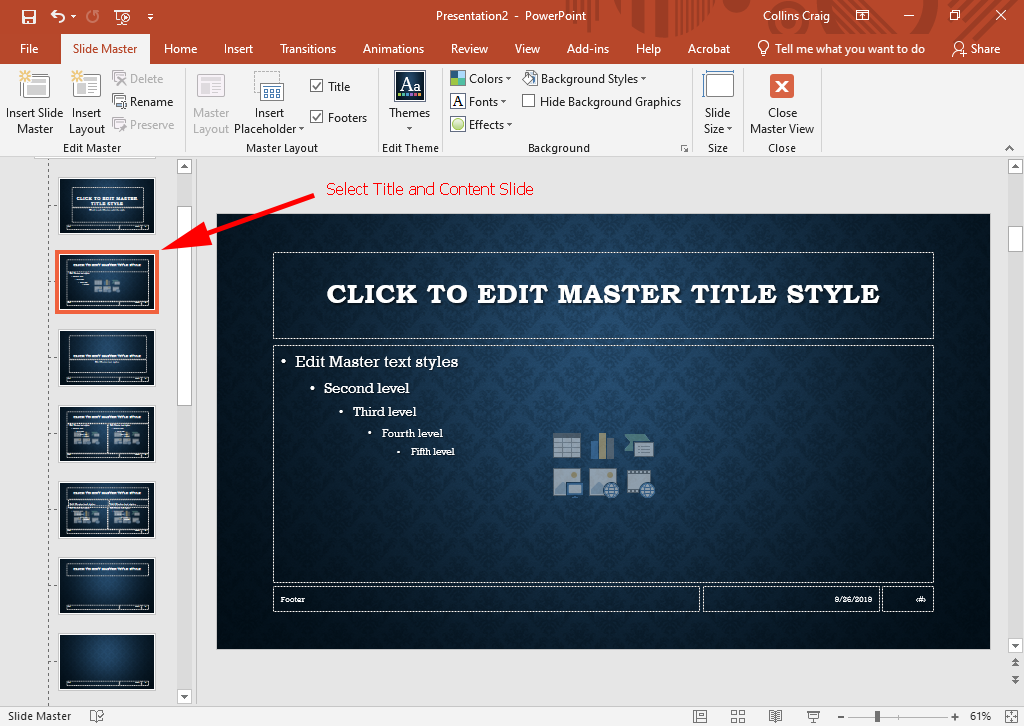
Highlight the text; select the Home tab, and increase the size of all the text items by clicking the [A^] button... I like the first line font size to be between 36 and 40.
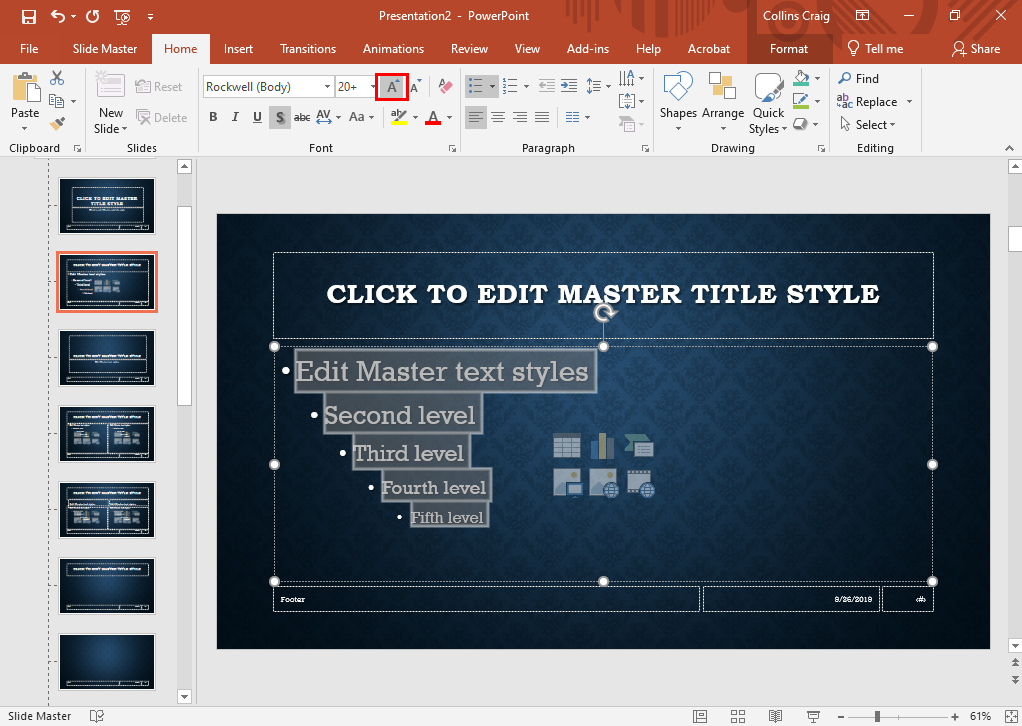
Now the text can be read from the back of an auditorium. Click Slide Master and close the tab.
Note: you can also change from Wide screen slide to the traditional Standard slide size on the Design tab.
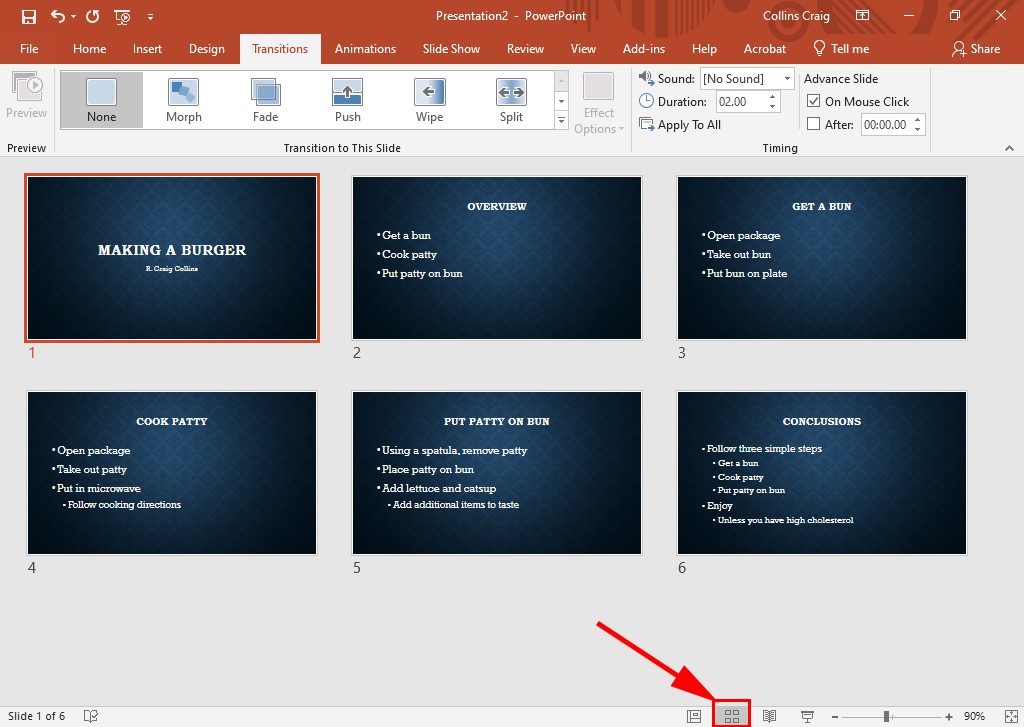
Now let's change to Slide sorter view.
In the lower left hand corner, choose the four box icon.

From here, you may right click and hide a slide, or drag a slide from one place to another, or apply transitions. Select a slide or slides, then on the Transitions tab, choose a transition. I like Fade
As with Word, in order to add images, you use Insert/Image/from ClipArt... to add a picture of a hamburger on the first or last slide,
double click the slide to go back to the Outline view for that slide, then insert an image.
Note, you may select Commons images that you are free to use.
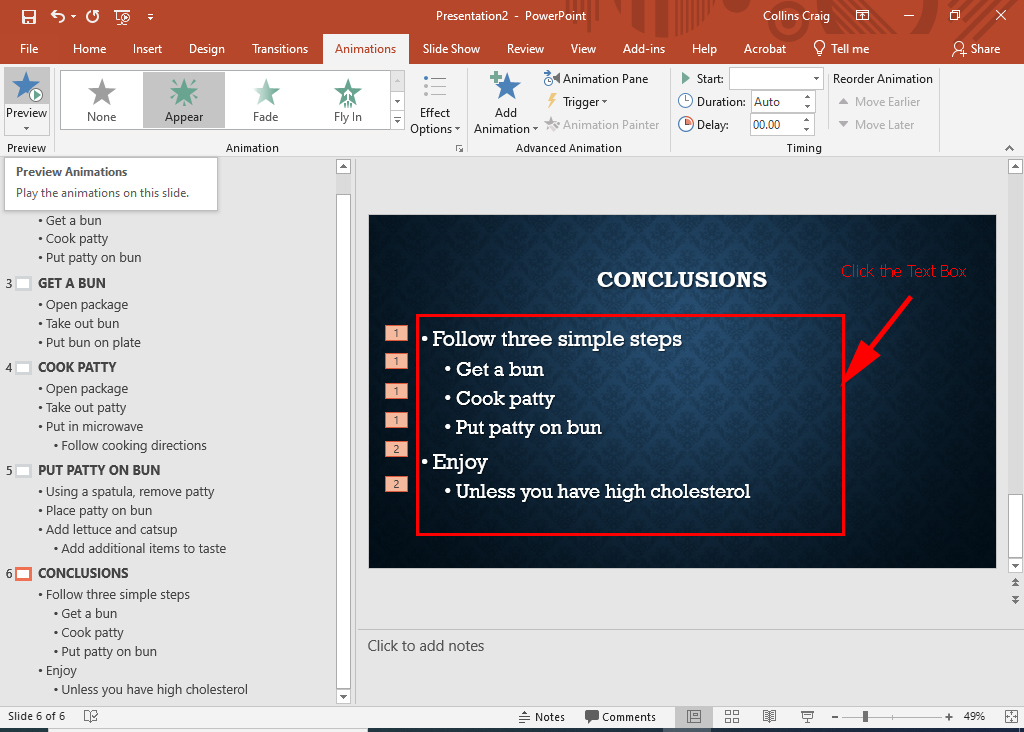
Additional tricks can be done with custom animation. Go to the last slide, making sure you are in normal outline view; click the text box, you should a box with dashed lines...
THEN choose the Animation tab, and select Appear.
Note for academic presentations, you also need to include your references... making a burger does not require these citations.
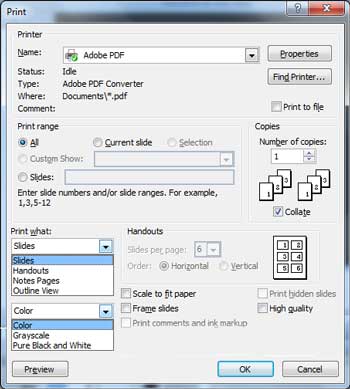
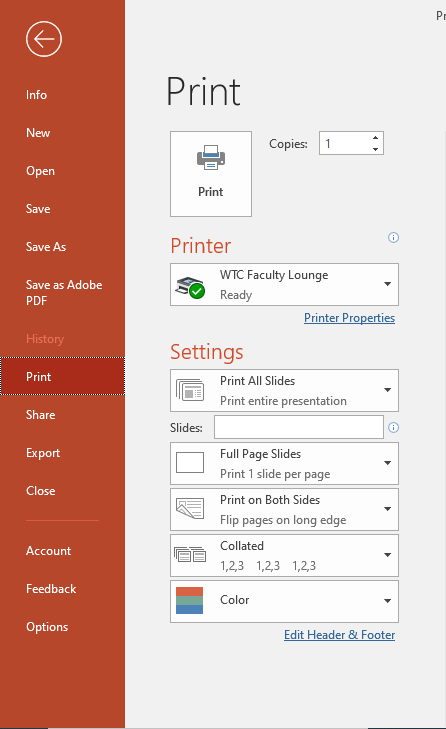
Finally, when printing, you may print slides, handouts, or notes. If printing
handouts, I choose 6 slides per page, and print in Pure Black and White for
the best results.
 |
It might be easier to see all the options by looking at a previous version
|
Save your presentation as yourname-test.pptx
pdf version of image above
See also PowerPoint Tips, a step by step pdf